
In short: In pre-drywall inspections of 12 new homes, every home had framing or structural defects that would soon have been hidden behind drywall.
📅 October 30, 2026 • ⏱️ 14 min read
In pre-drywall inspections of 12 new homes, every home had framing or structural defects that would soon have been hidden behind drywall. Eleven of the 12 had problems with the house wrap or flashing, the layer that keeps water out of the walls.
| 12 new homes inspected before drywall | 11 of 12 had house wrap or flashing defects | 8 of 12 had anchor bolts missing, loose or misplaced |
Why inspect before the walls are closed
A pre-drywall inspection happens after framing, roofing, windows and rough plumbing, electrical and HVAC are in, but before insulation and drywall. It’s the only time anyone can see the anchor bolts, truss connections, hangers and flashing that hold the house together and keep it dry. Once the walls close, these defects can only be found by cutting them open.
Four of these homes also had a final-phase inspection before closing, so we could see what happened to the problems flagged earlier.
Each inspection followed the NC Home Inspector Licensure Board Standards of Practice, or the SC standards for homes in South Carolina. Client names and street addresses have been left out.
The homes
Twelve new-construction homes in ten towns across North and South Carolina.
| Home | Location | Inspections |
| Home A | Statesville, NC | Pre-drywall |
| Home B | Mooresville, NC | Pre-drywall |
| Home C | Indian Land, SC | Pre-drywall |
| Home D | Gastonia, NC | Pre-drywall |
| Home E | Mooresville, NC | Pre-drywall and final |
| Home F | Weddington, NC | Pre-drywall and final |
| Home G | Davidson, NC | Pre-drywall and final |
| Home H | Davidson, NC | Pre-drywall and final |
| Home I | Huntersville, NC | Pre-drywall |
| Home J | Charlotte, NC | Pre-drywall |
| Home K | Fort Mill, SC | Pre-drywall |
| Home L | Harrisburg, NC | Pre-drywall |
By the numbers
11 of 12 homes had house wrap or flashing defects before siding went on
Number of homes (out of 12) where each issue was found at the pre-drywall inspection
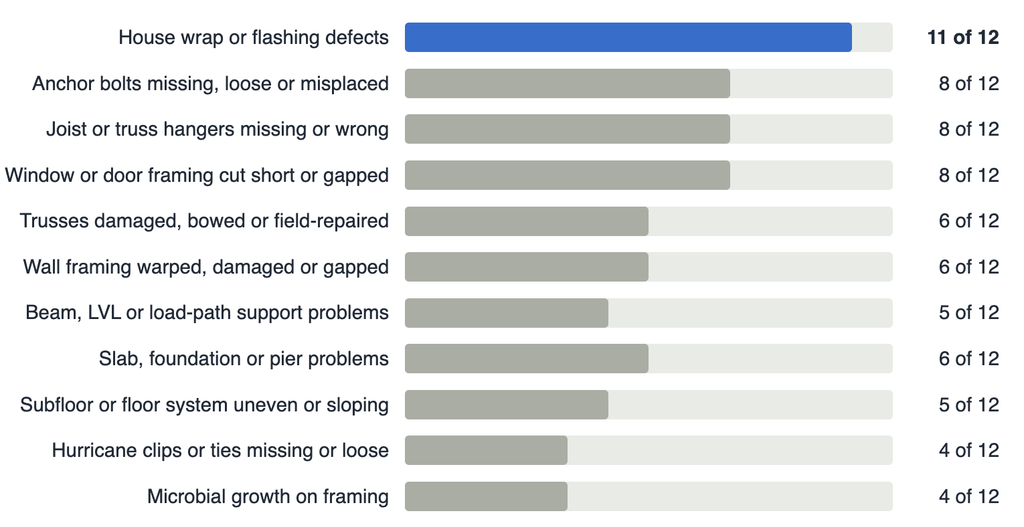
Water barrier problems were nearly universal. Missing or loose anchor bolts, bad hanger installs and poorly framed window and door openings each showed up in two of every three homes.
The most significant findings
House wrap and flashing defects (11 of 12 homes)
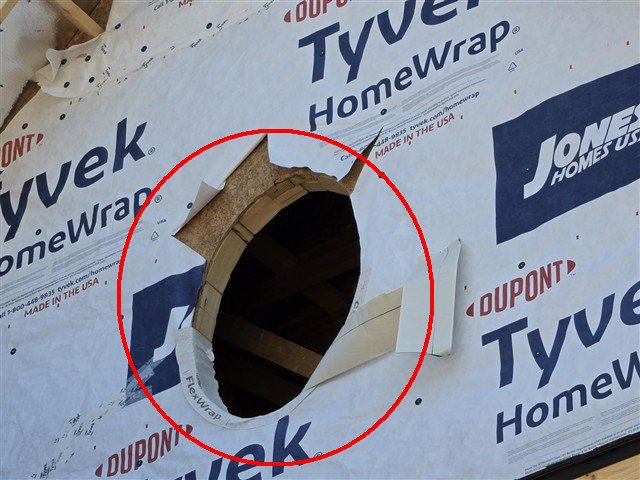
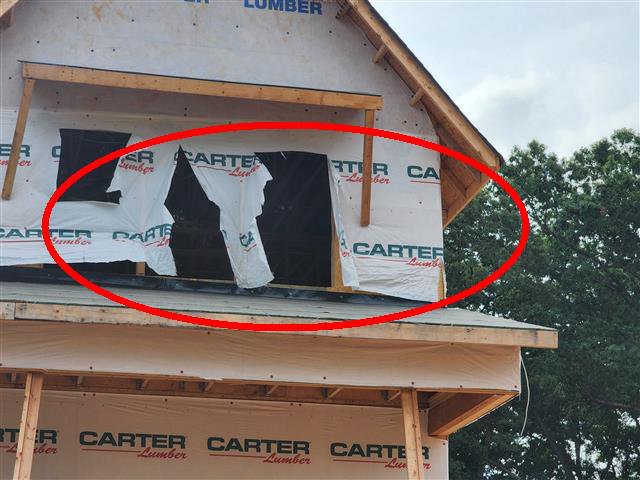
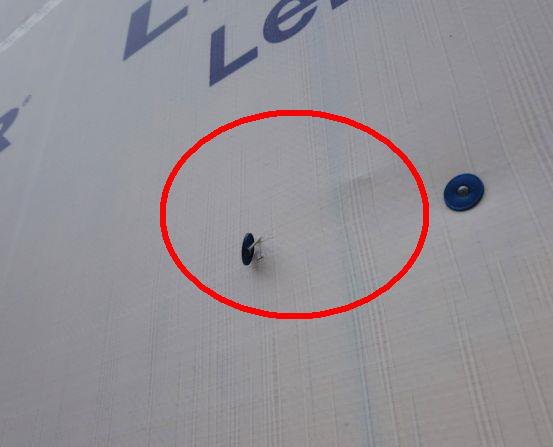
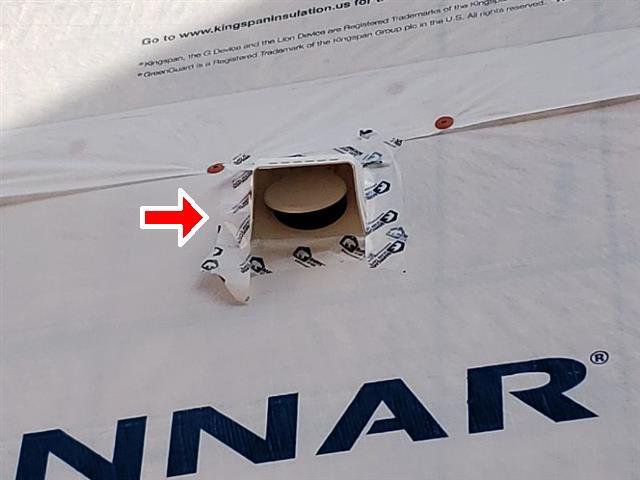
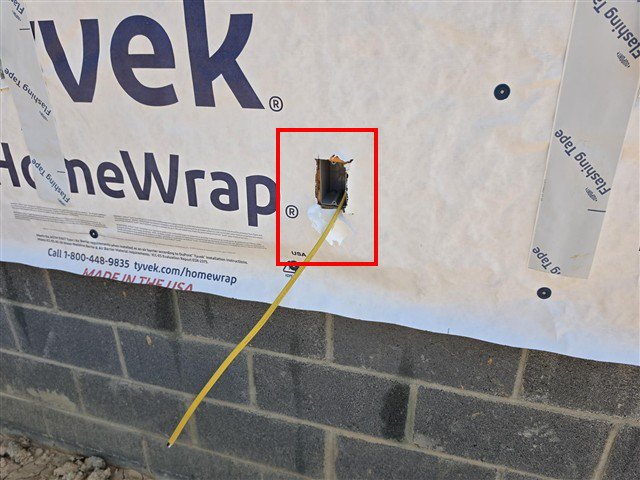
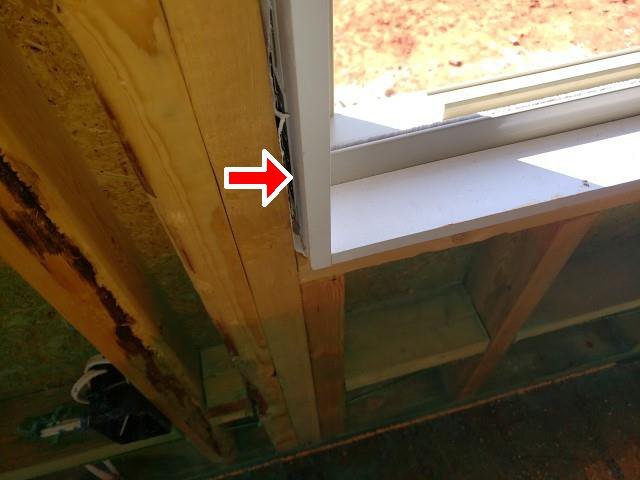
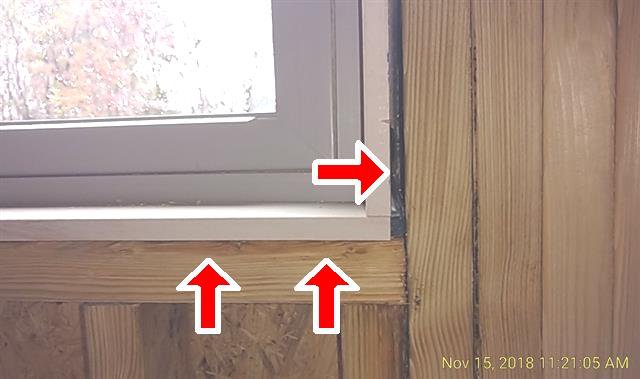
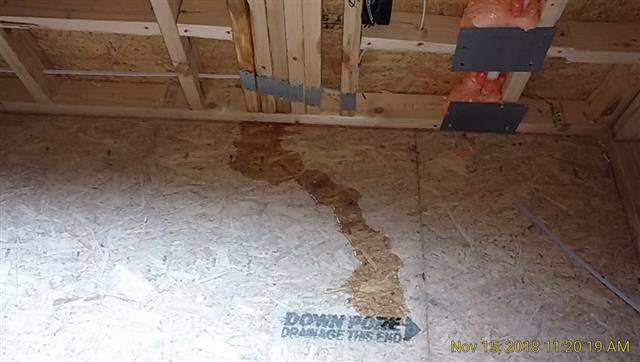
House wrap was torn, loose, missing in areas or not taped at the seams. Electrical boxes, vents and pipes went through the wall with no flashing, or with flashing that wasn’t secured. At Home B, there was no visible flashing at the front gable windows. At Home F, windows weren’t sealed at the sill and the flashing tape wasn’t bonding. At Home L, a second-floor window already had active water intrusion at the sill, staining the subfloor below. Once siding goes on, fixing these usually means taking the siding back off.
Anchor bolts missing, loose or damaged (8 of 12 homes)
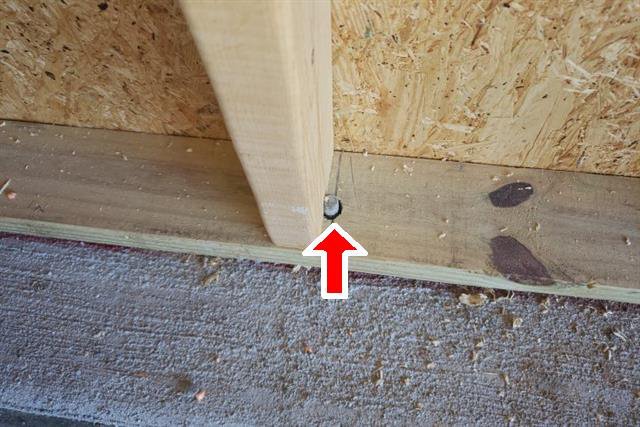
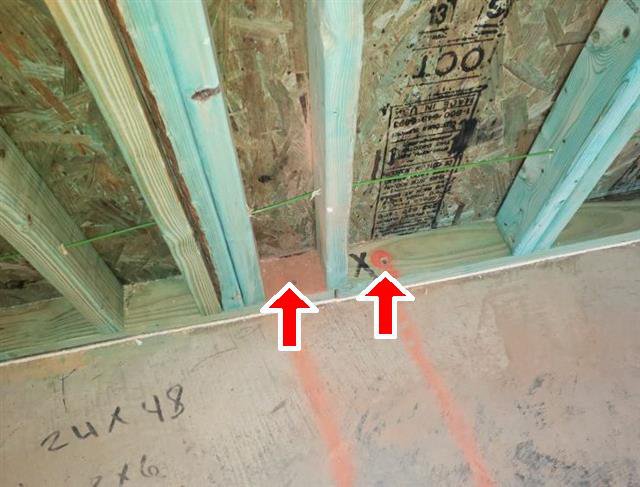
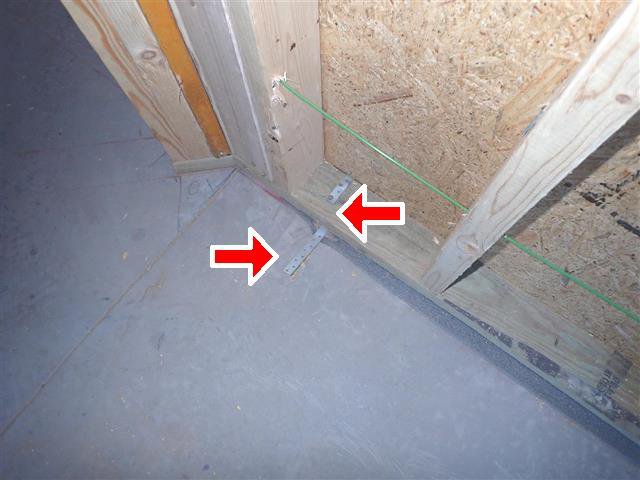
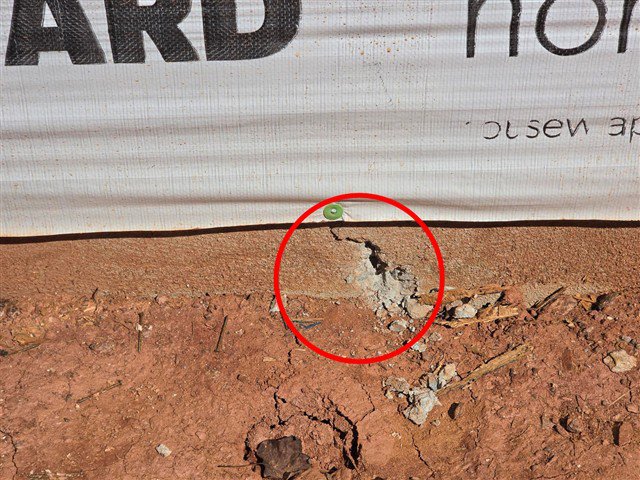
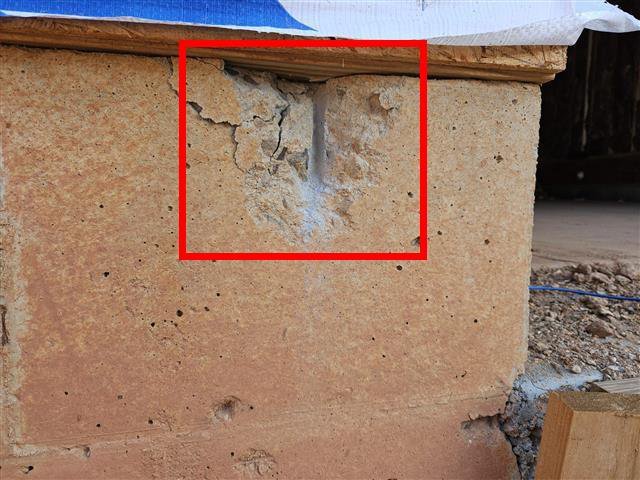
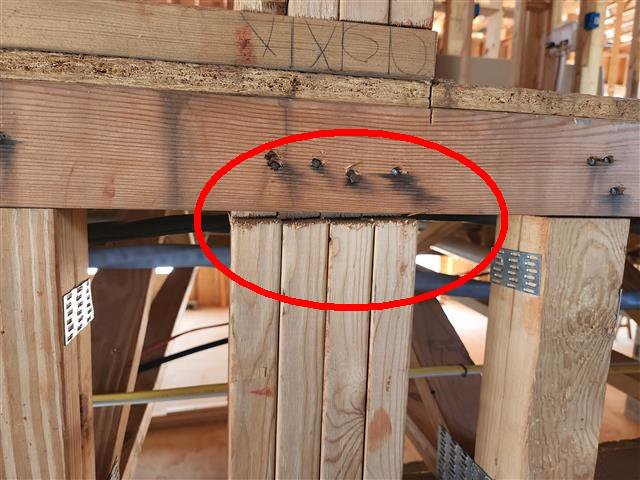
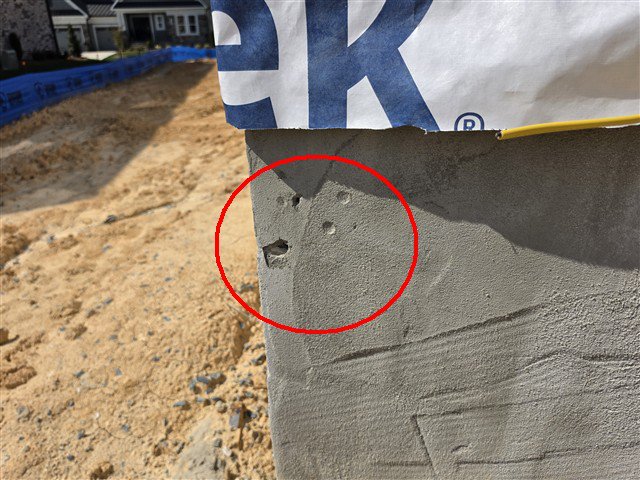
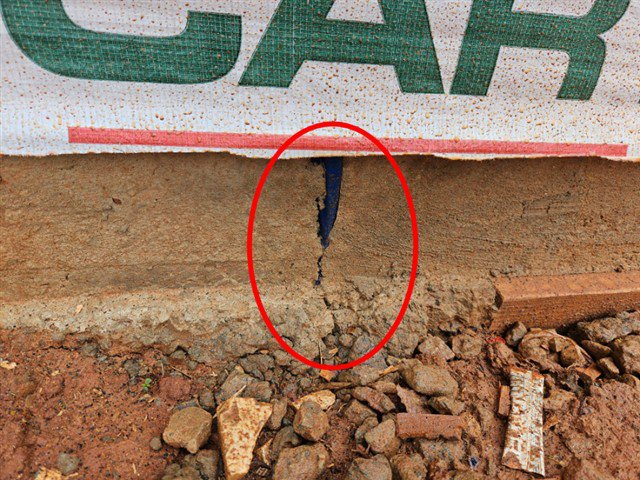
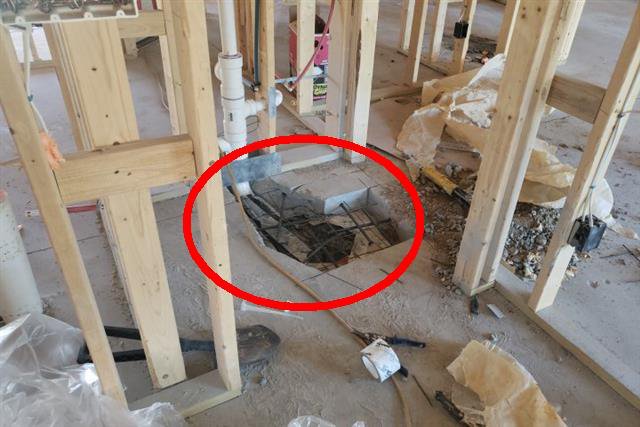
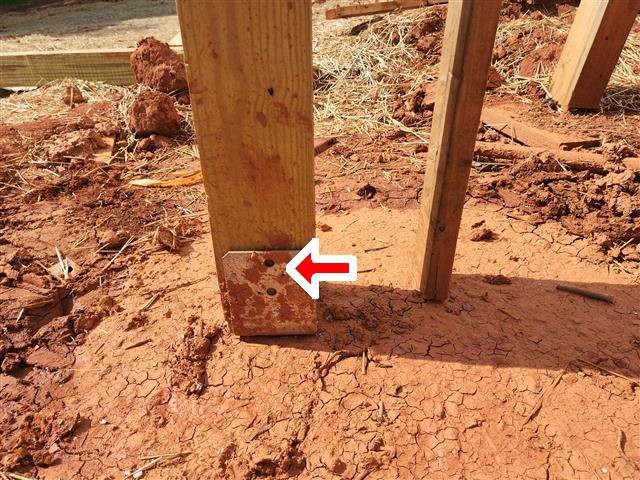
Anchor bolts and straps tie the wall framing to the foundation so the house resists uplift in high winds. We found bolts missing near the ends and splices of the sill plates, bolts with no washers or nuts, nuts left loose and straps not nailed off. At Home H, the sill plate was damaged where a bolt was hammered through. At Homes A and D, installing the bolts had cracked the slab and left voids at the edge.
Trusses damaged, bowed or field-repaired (6 of 12 homes)
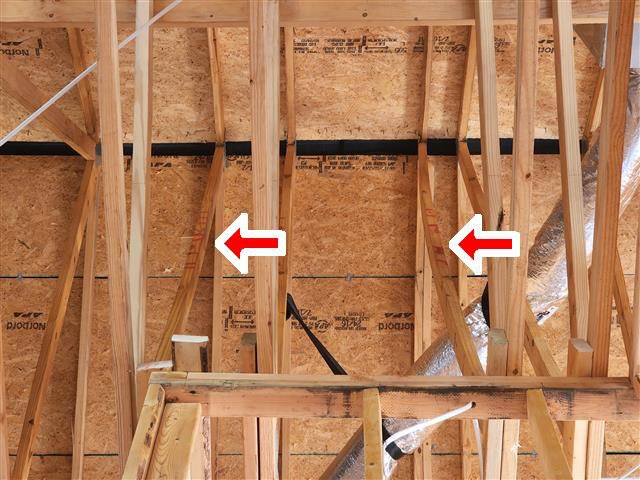
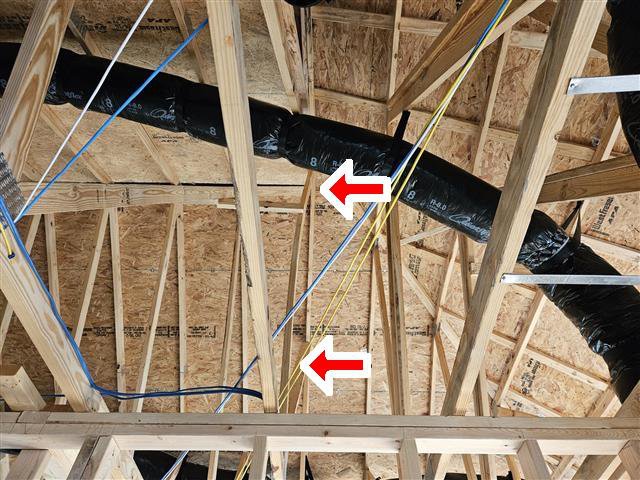
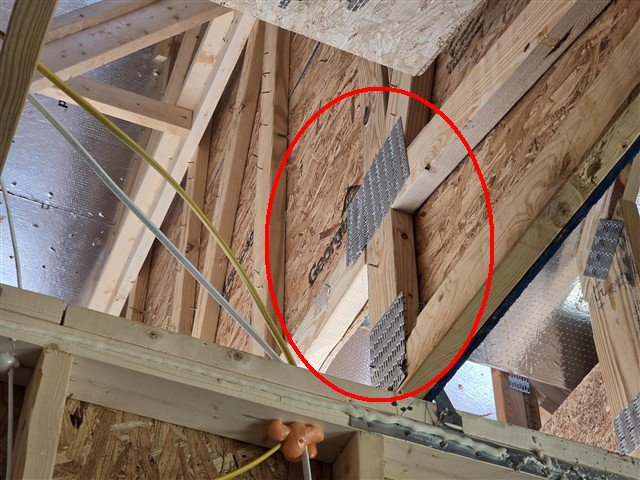
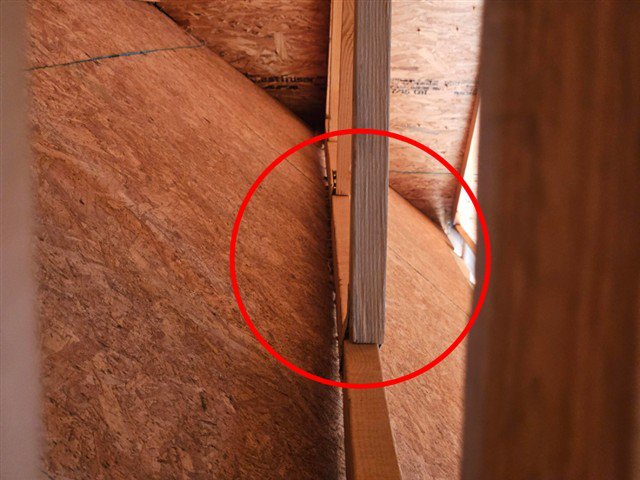
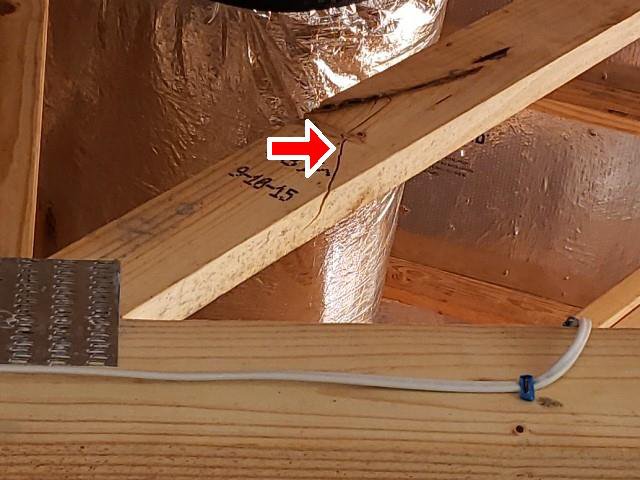
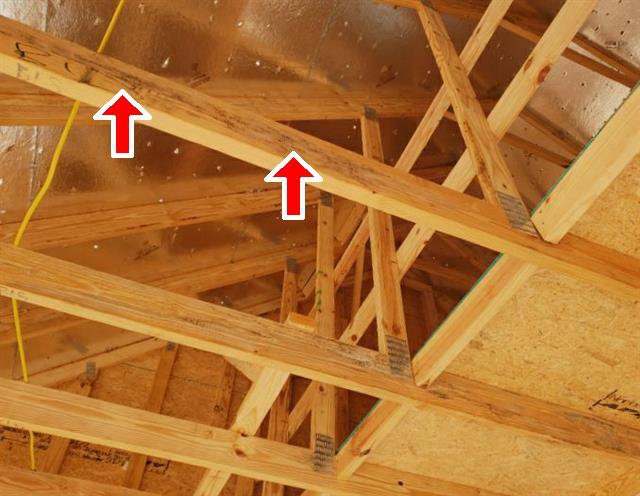
Six homes had cracked, bowed or damaged trusses or gusset plates. At Home E, a truss above a bathroom was cracked and two trusses over the stairwell were bowing. At Home D, a truss member above the bonus room was badly bowed. At Home F, trusses had already been repaired on site. Truss repairs need a method from the truss manufacturer or a licensed structural engineer, and before drywall is the time to get that letter.
Hangers and hurricane ties missing or installed wrong
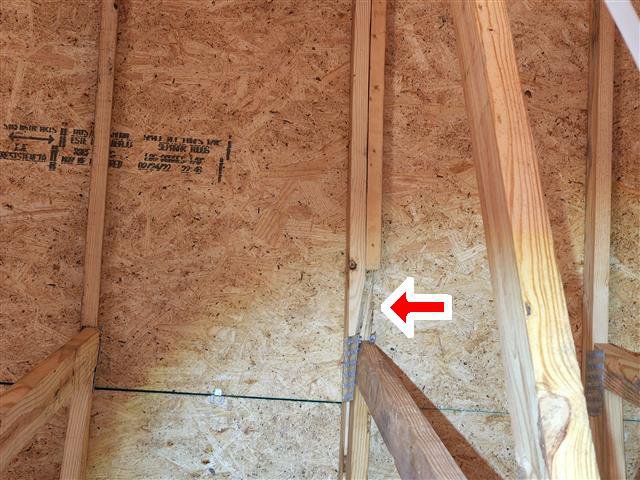
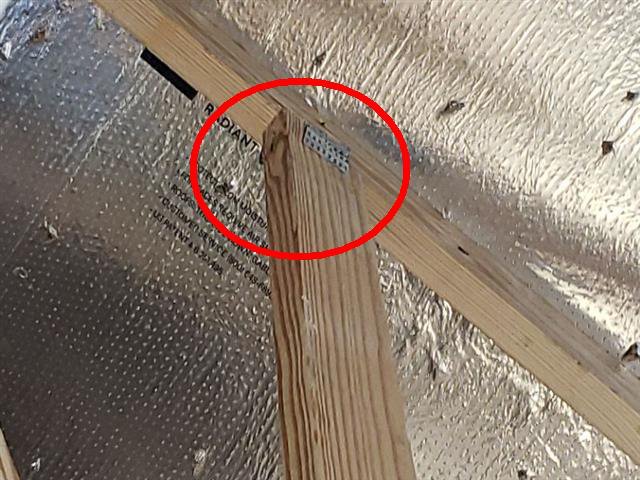
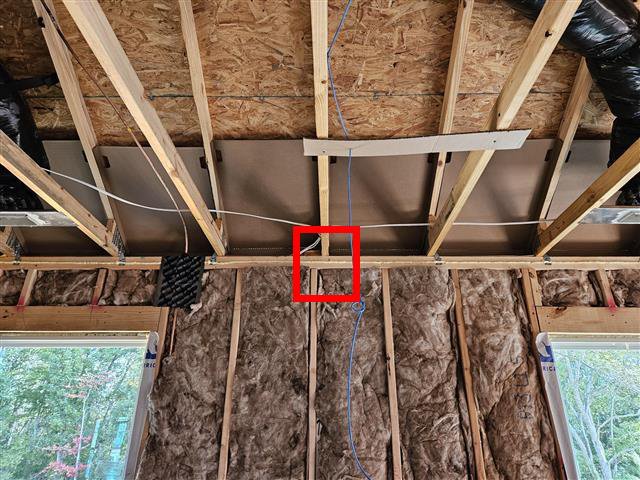
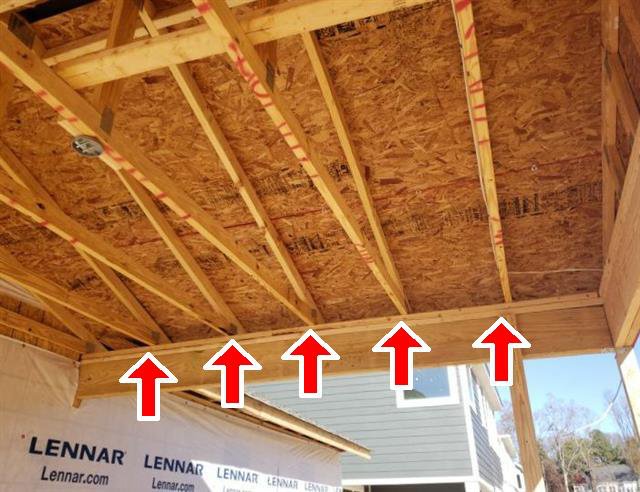
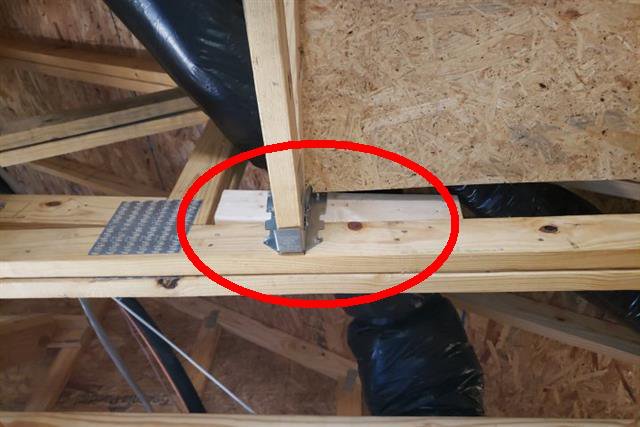
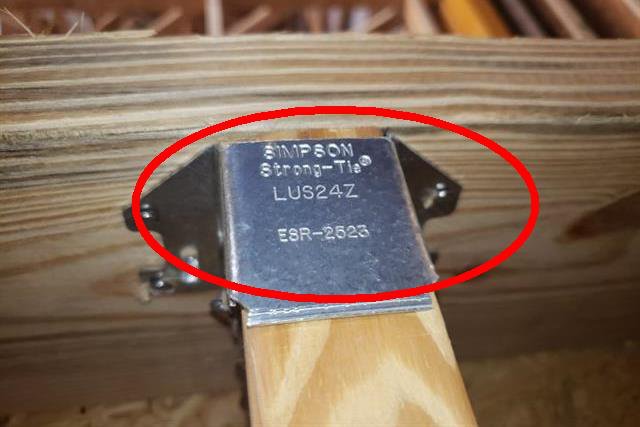
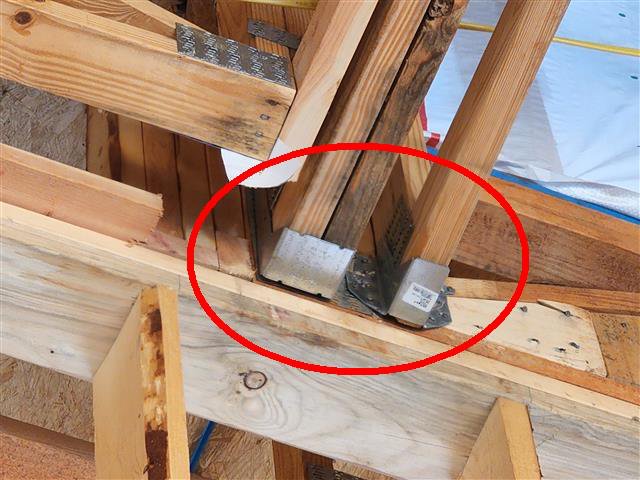
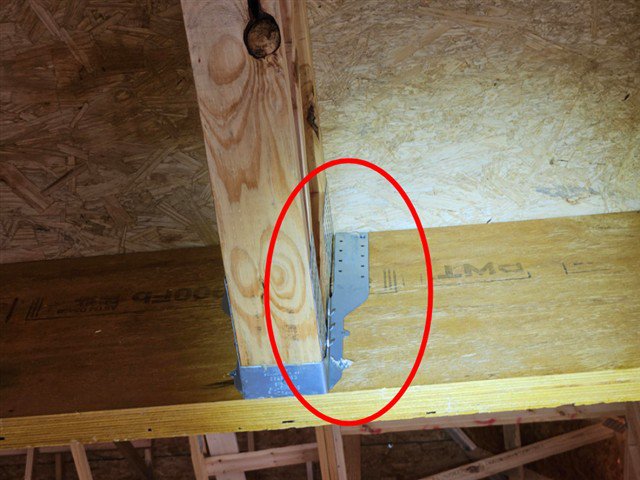
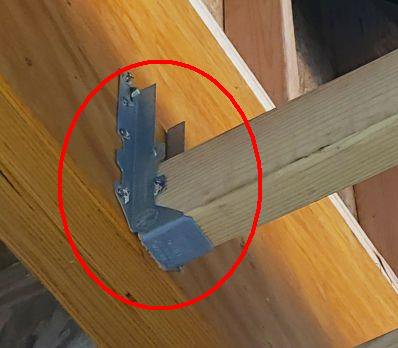
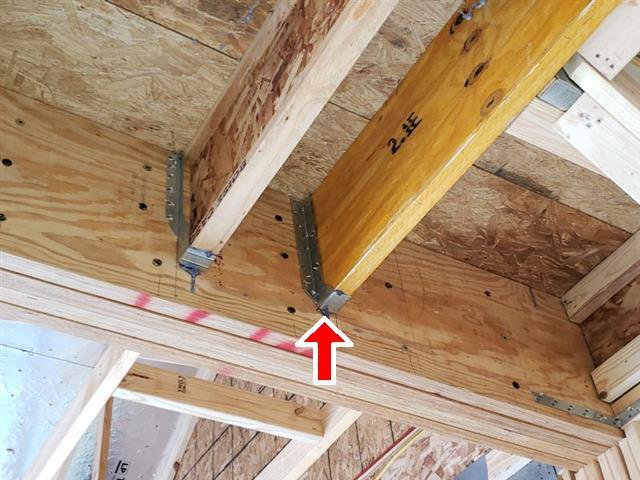
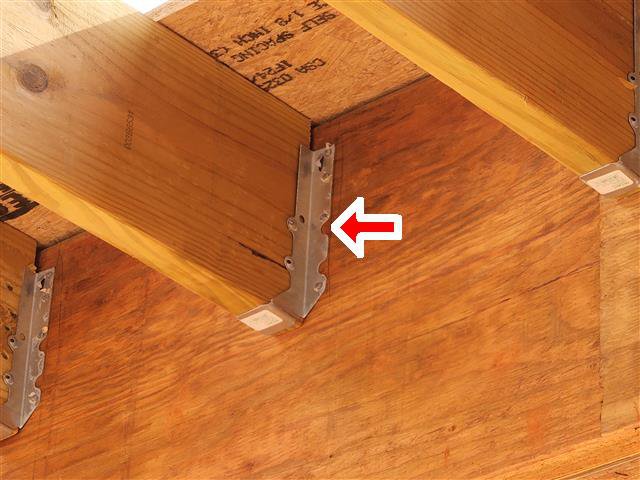
Eight homes had joist or truss hangers that were missing, the wrong size or missing nails. At Home L, I-joists above a bathroom had no hangers at all. Four homes had hurricane clips missing or loose, including at the covered porch roof at Home H. These connections hold the roof and floors in place, and all of them disappear behind insulation and drywall at the next stage.
Beams, LVLs and load paths (5 of 12 homes)
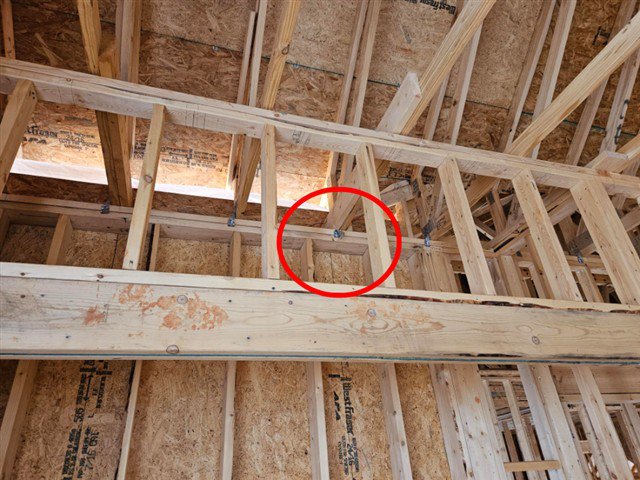
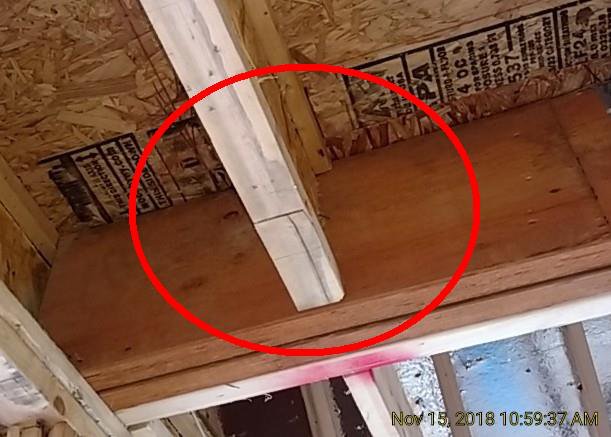
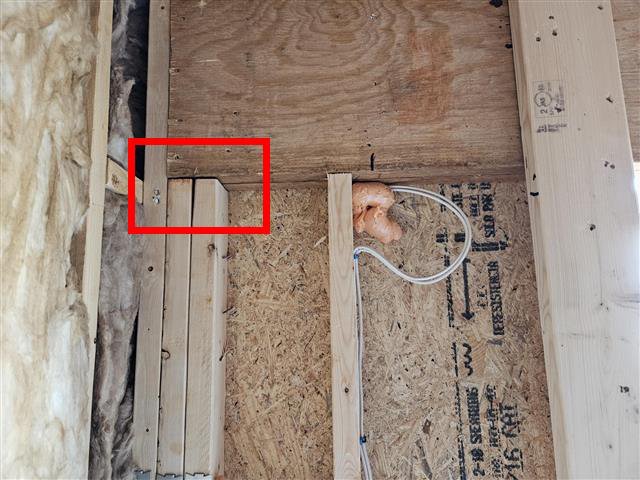
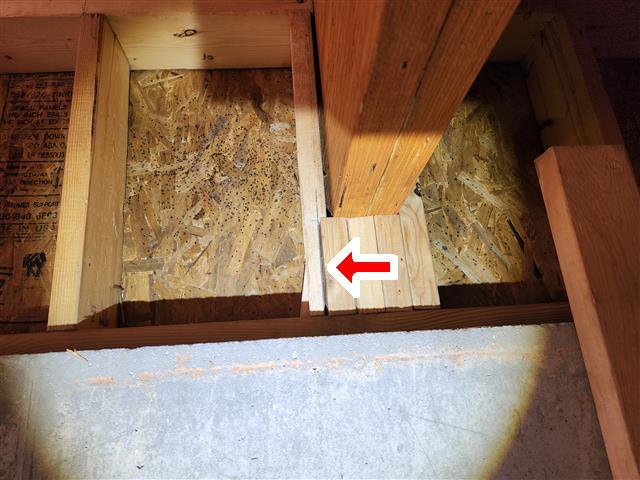
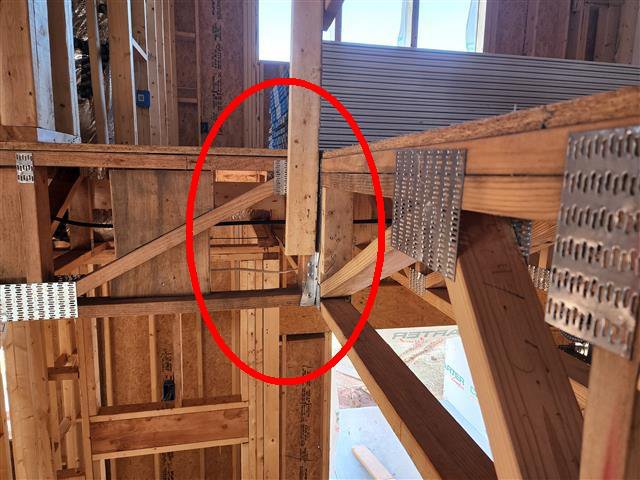
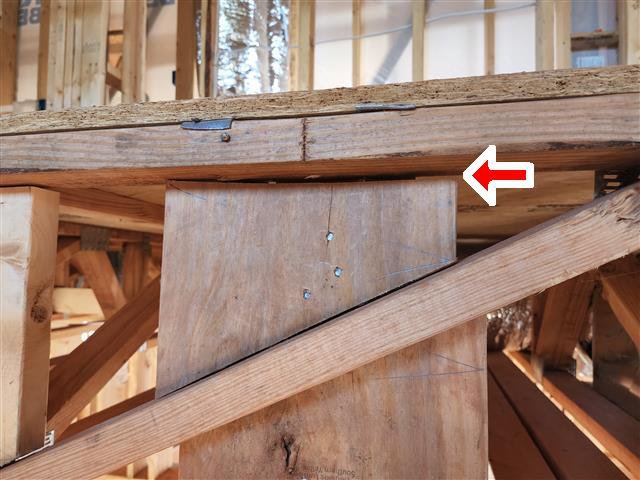
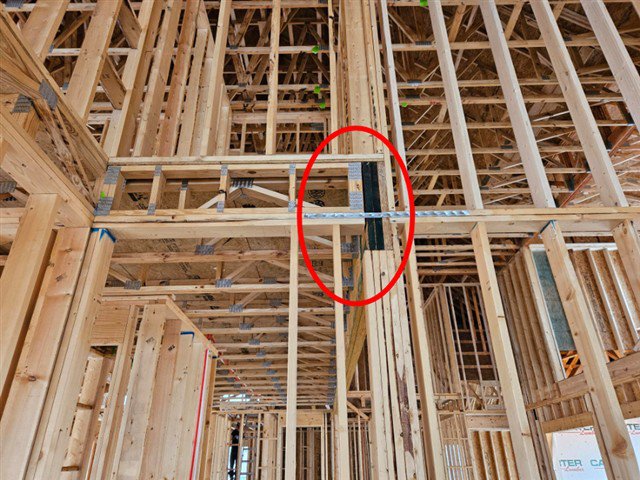
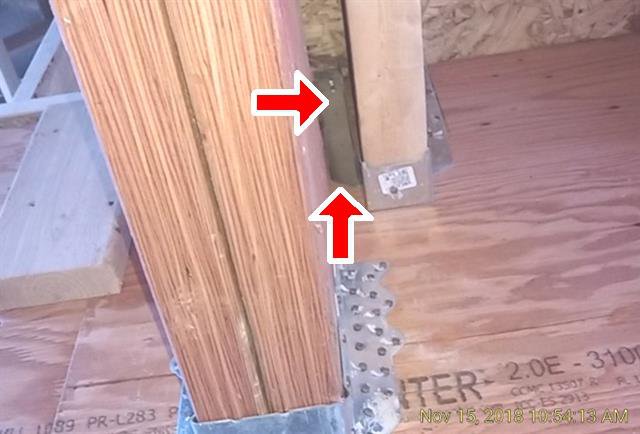
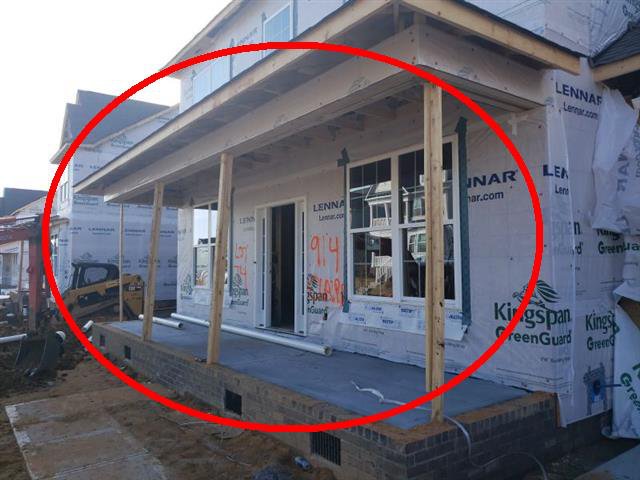
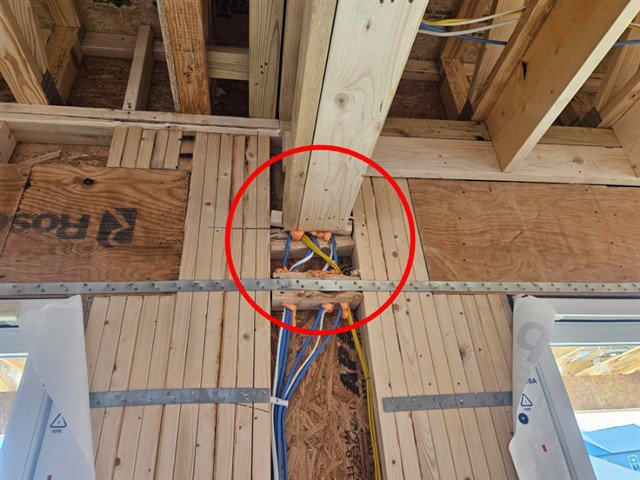
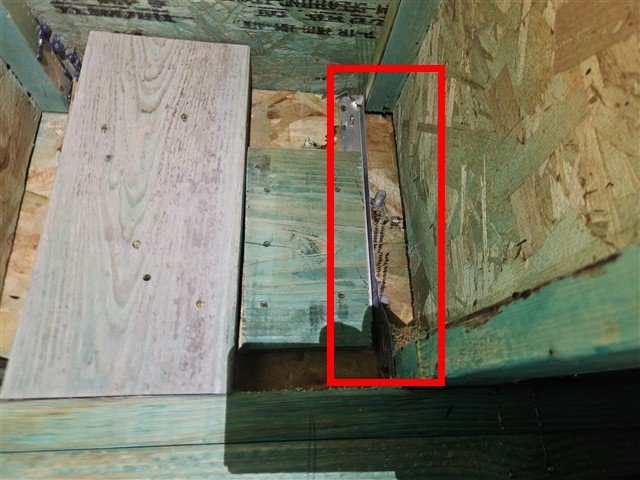
Beams and LVLs (engineered lumber beams) carry concentrated loads, so the posts and studs under them have to carry that weight all the way down to the foundation. At Home D, an LVL in the basement had no clear support path down to the slab, and the studs under the garage door header had large gaps. At Home E, the jack studs under the main beam were gapped and notched, two floor systems met over the stairwell without proper support, and the squash blocks weren’t touching the floor above. At Home C, several spots didn’t carry the load from the attic down to the foundation, and a floor support was held only by a strap and nails. At Homes G and L, hangers on an LVL or laminated beam were missing nails, and Home G’s covered porch was still sitting on temporary posts. A beam that isn’t fully supported can sag over time, and once the walls are closed nobody can see why.
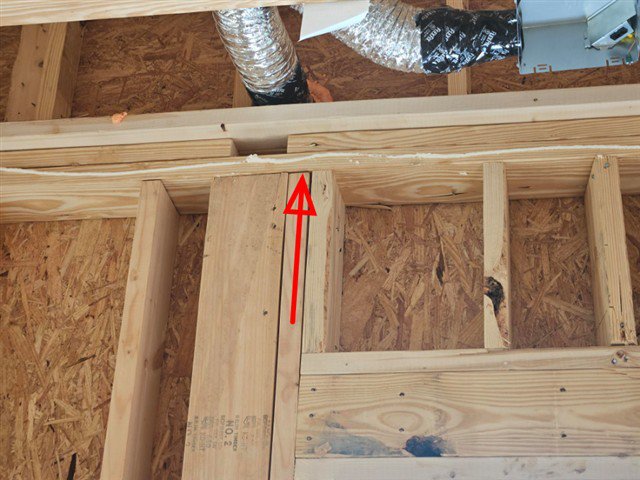
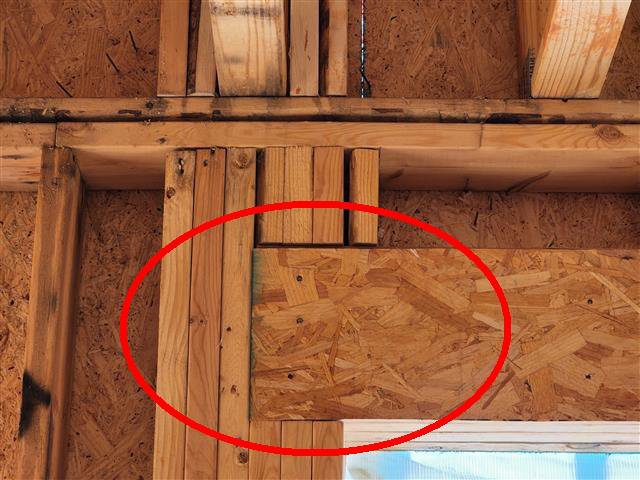
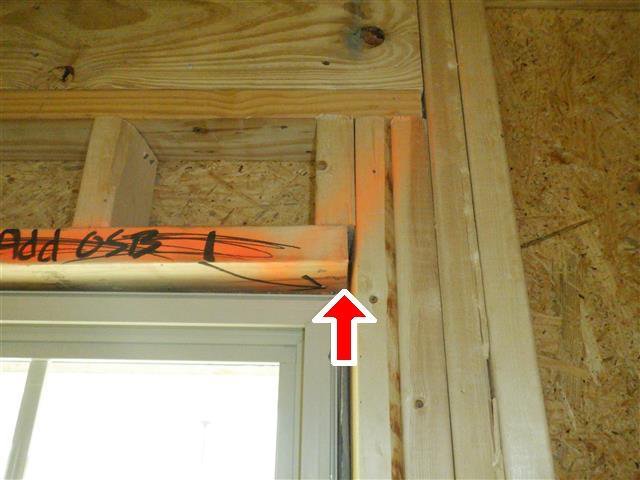
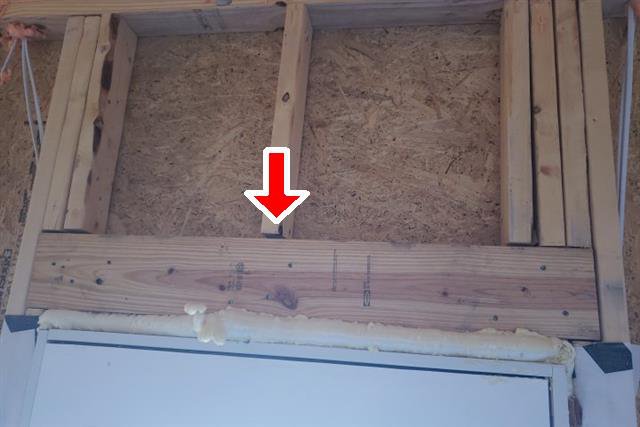
Window and door framing cut short or gapped (8 of 12 homes)
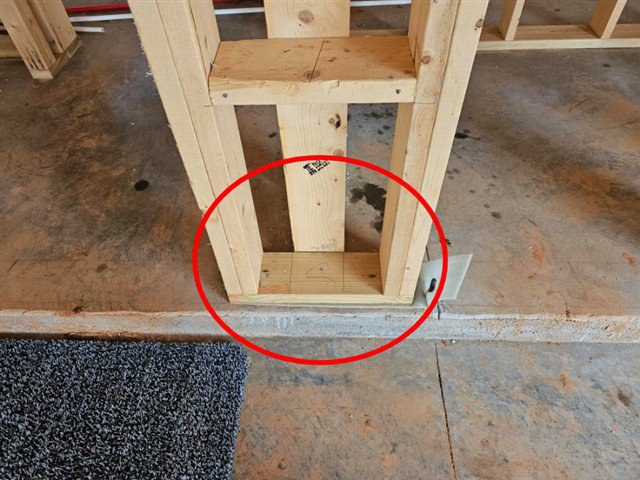
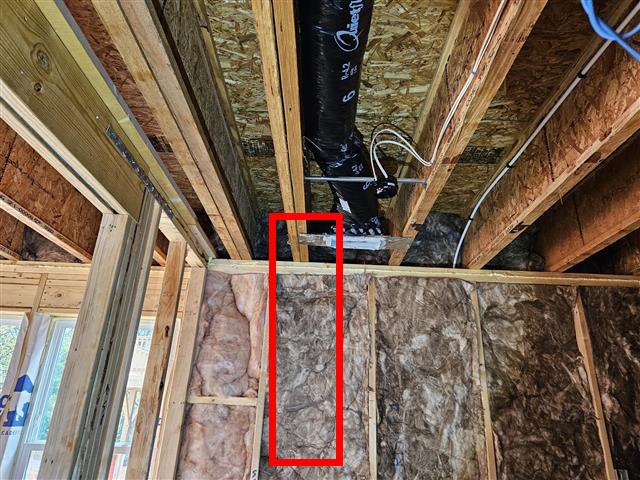
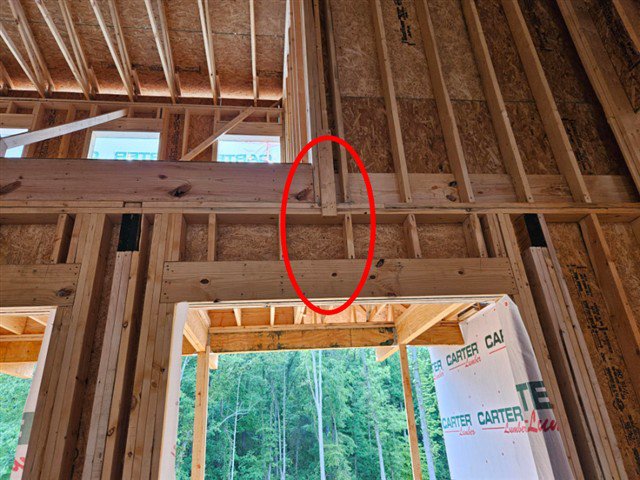
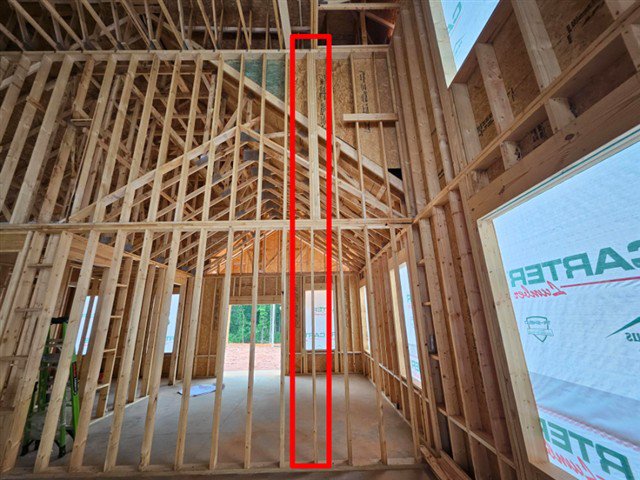
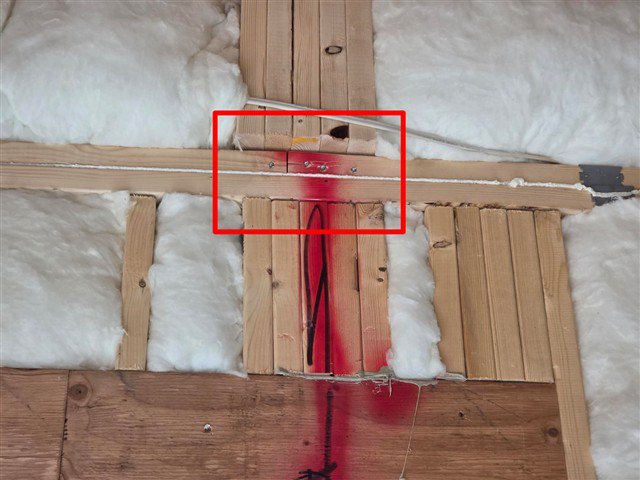
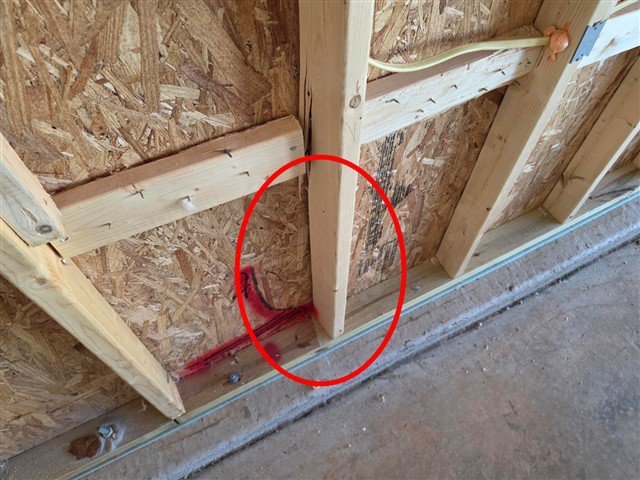
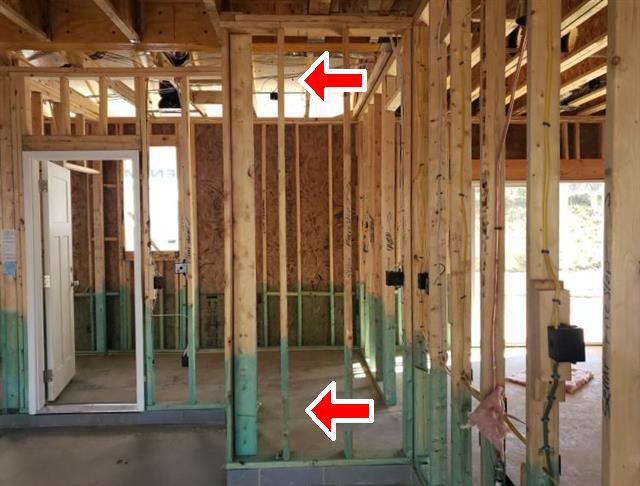
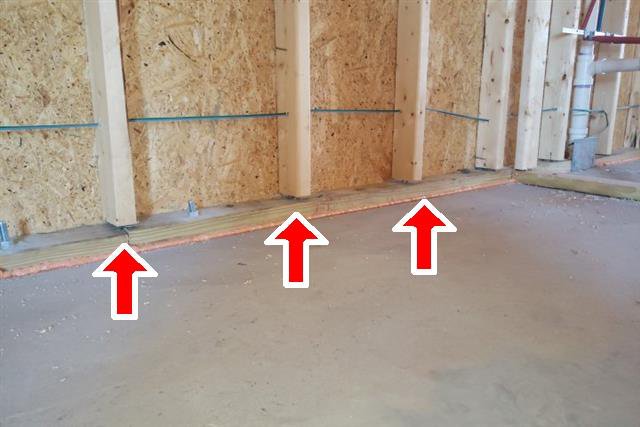
King, jack and cripple studs around windows and doors were cut short or left with gaps, so they don’t carry the load from the header down to the floor. Once drywall goes up, this can show up as a bowed wall or a window or door that sags.
Wall framing and stairs
Six homes had studs that were warped, cracked, damaged or gapped at their connections. At Home K, an exterior wall had been cut by another trade and had gaps of 1/4″ to 1/2″ at the plates. At Home H, a damaged stud between the garage and mud room was loose. At Home J, the stairwell landing was damaged.
Floors and subfloors (5 of 12 homes)
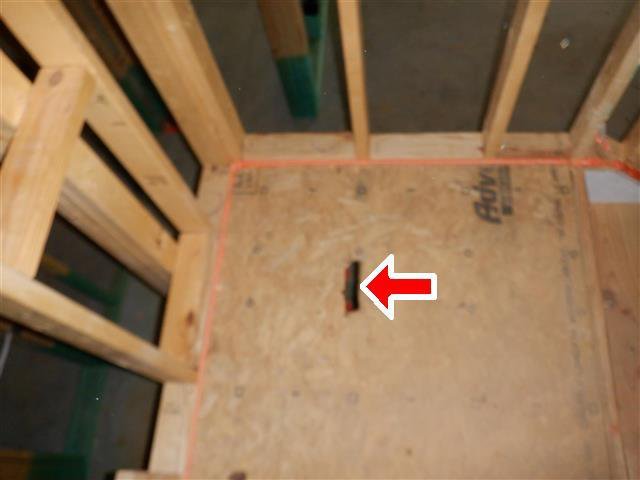
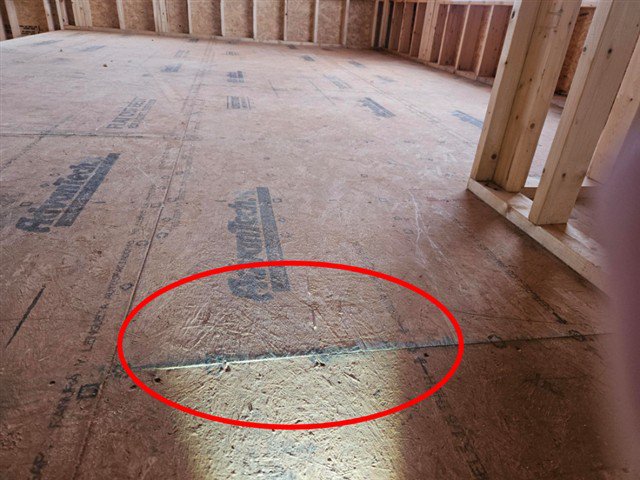
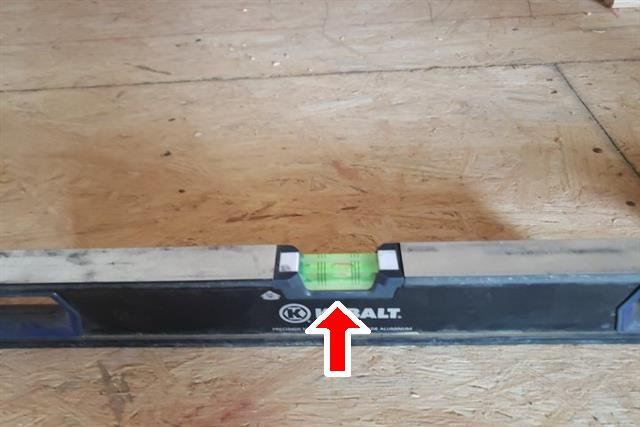
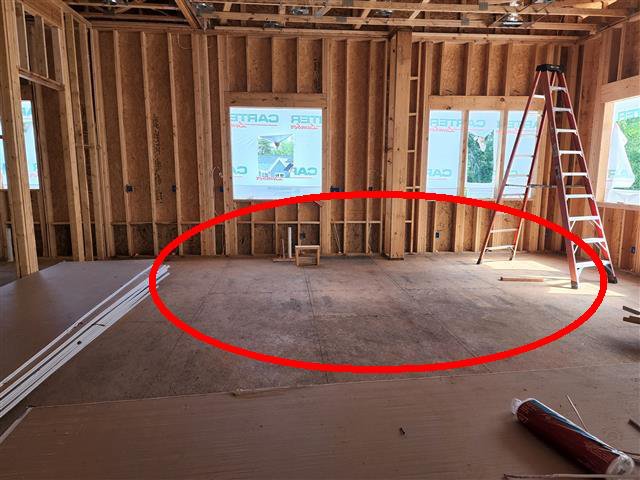
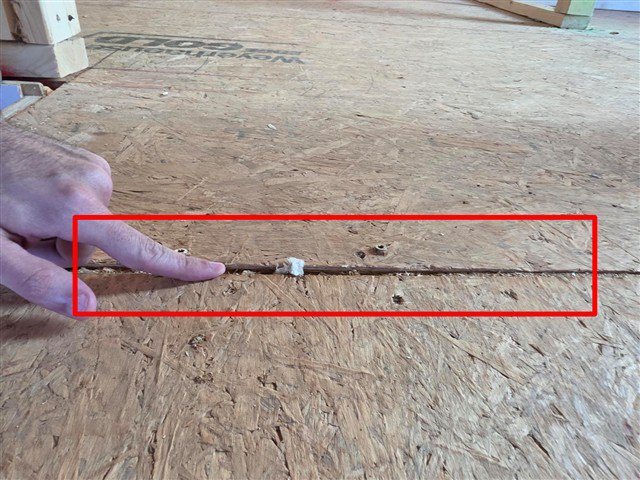
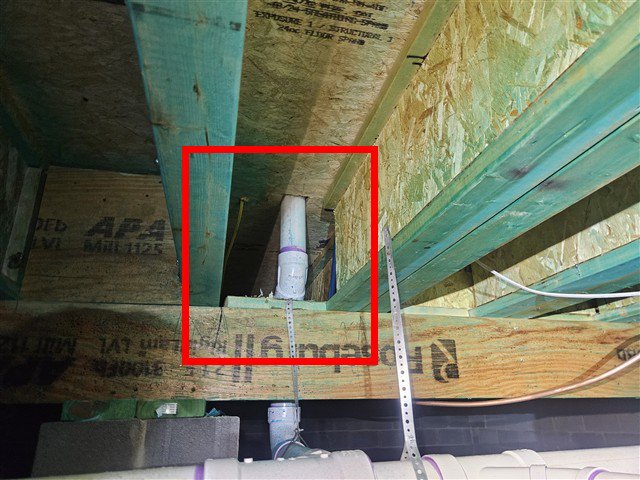
At Home E, the kitchen floor system sloped and popped when walked on. At Home K, the second floor sloped between a bedroom and the hallway. Homes A and C had uneven or buckling subfloor seams, and Home B had bumps in the floor surface and missing I-joist blocking in the crawl space. Left alone, uneven subfloors can lead to squeaks and damage to the finished flooring.
Slabs, foundations and piers (6 of 12 homes)
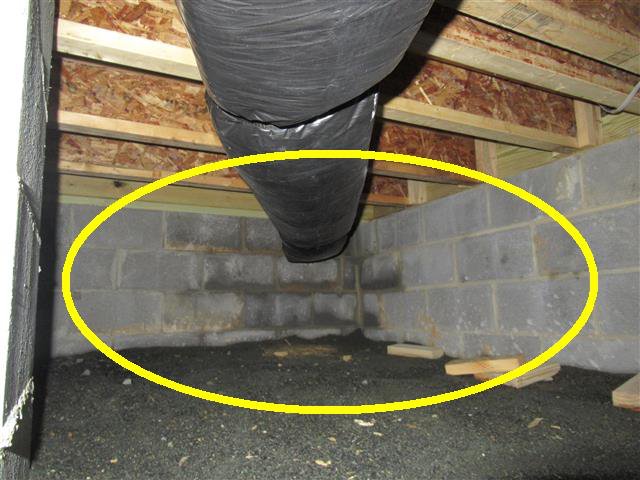
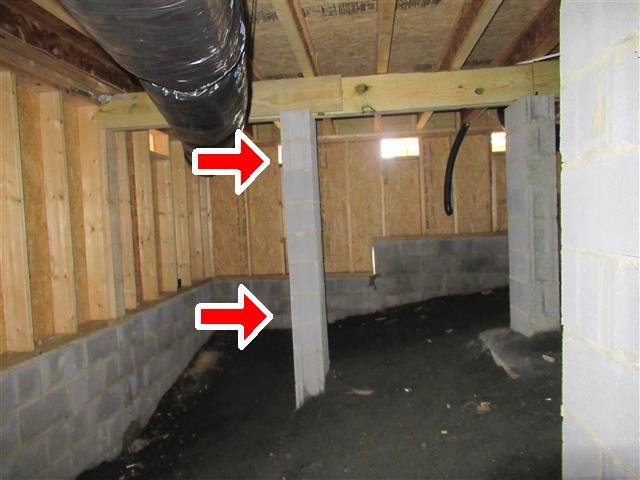
Home B had cracks in the concrete foundation wall. Home C had cracking at the foundation with building materials exposed to the outside. At Home K, the slab was damaged and being repaired during the inspection, which calls for an engineer’s letter afterward. At Home L, the crawl space block walls showed staining from moisture and one block pier was undersized.
Roof and sheathing
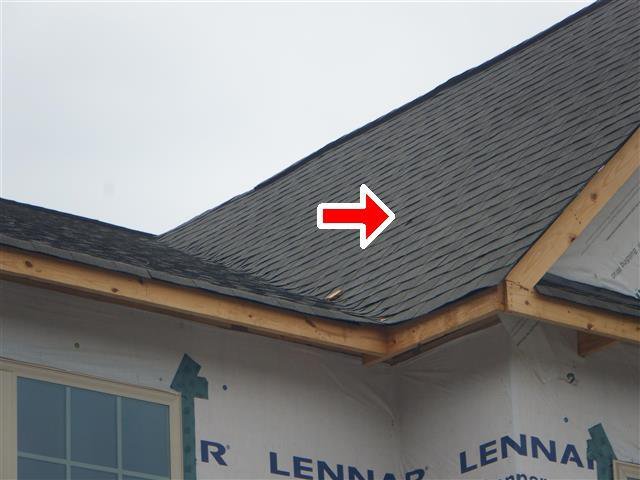
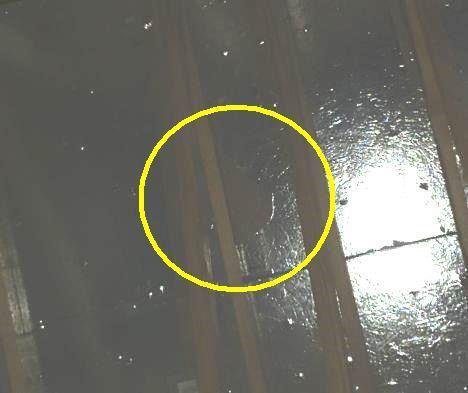
At Home J, shingles were missing on the front roof and there was a hole through the roof sheathing, so water could get straight in. Home J also had deflection in the gable end sheathing and damaged radiant-barrier foil on the roof deck. At Home G, exterior wall sheathing was missing or damaged.
Plumbing and HVAC rough-ins
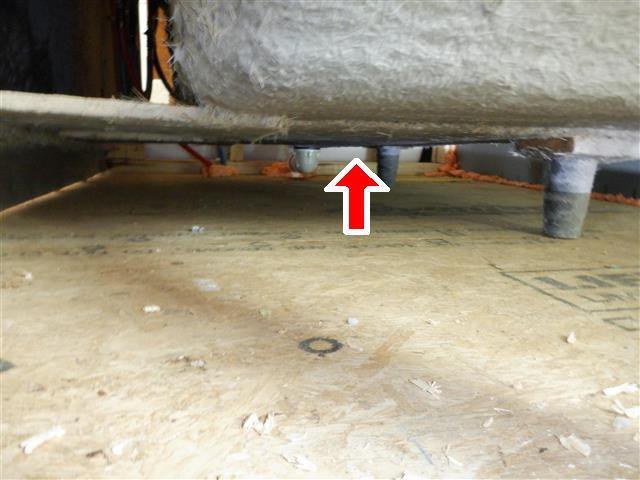
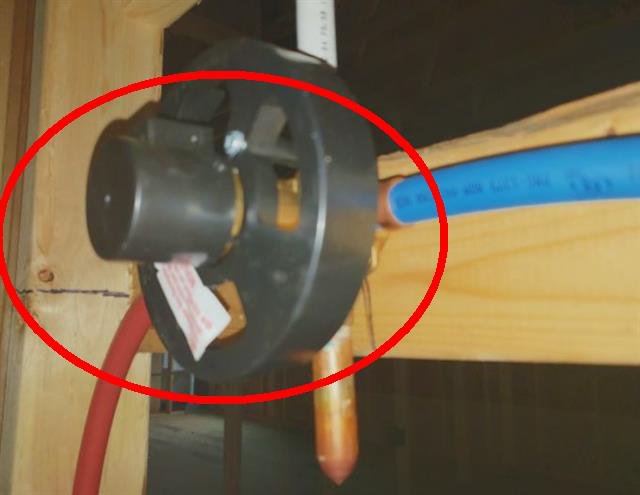
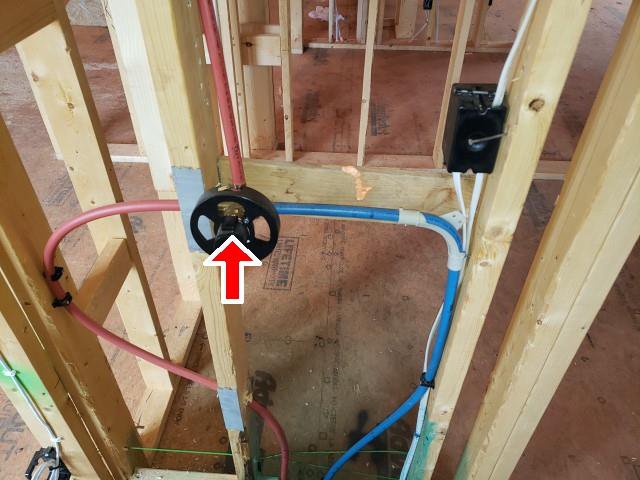
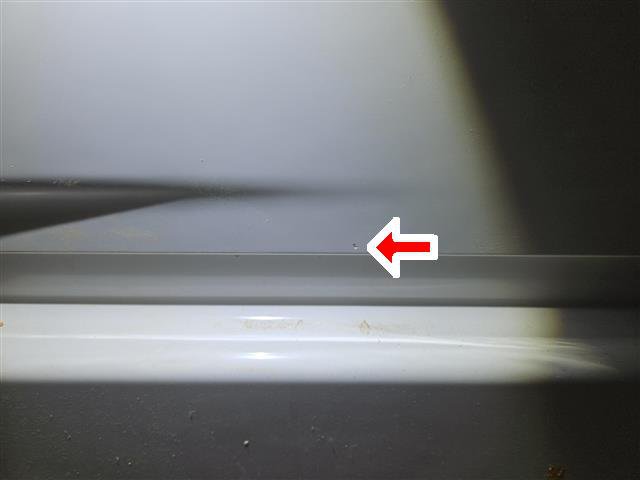
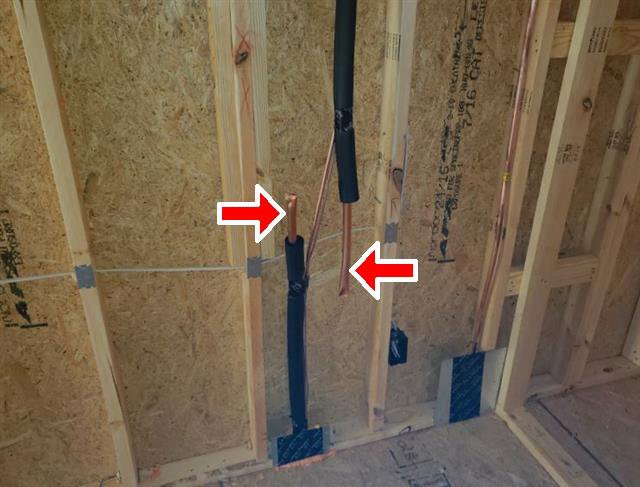
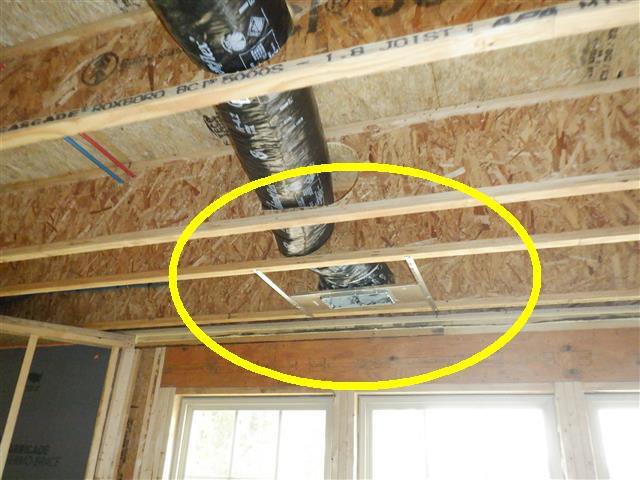
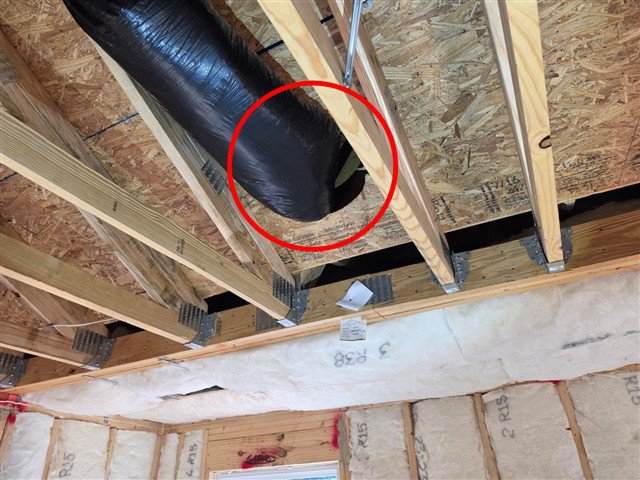
At Home J, the second-floor tubs were set without the mortar bed most manufacturers require, and shower valves were loose in their walls. Shower controls were also loose at Home F. Home D had a chipped fiberglass tub. At Home I, an AC suction line was damaged and left uncapped, which lets debris into the system. Homes A and J had flex ducts kinked badly enough to restrict airflow.
Fire safety and air sealing
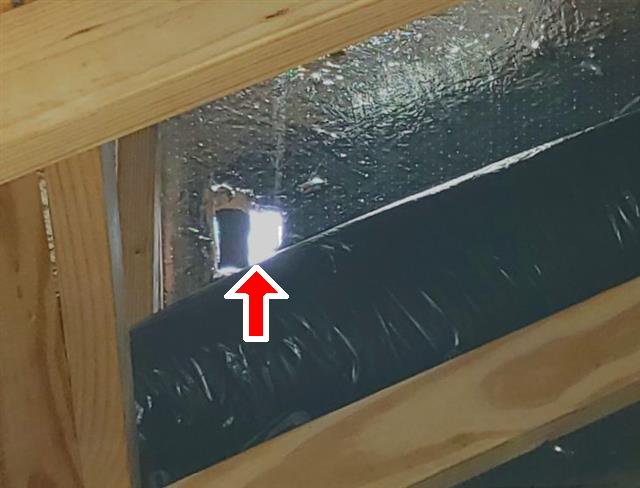
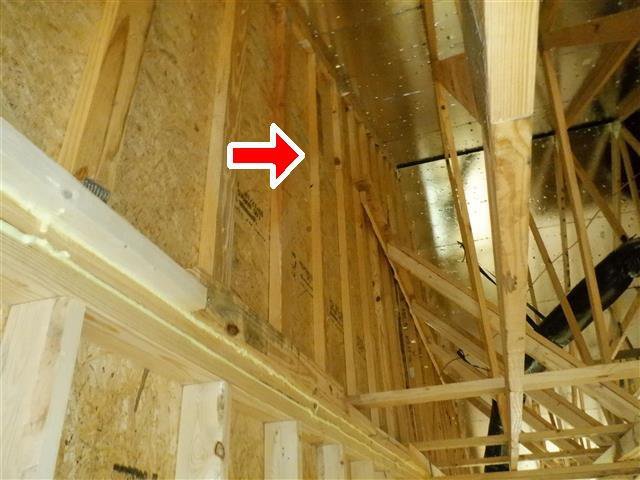
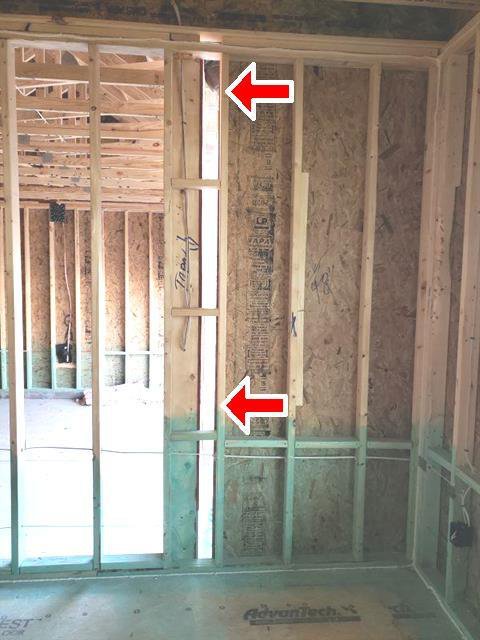
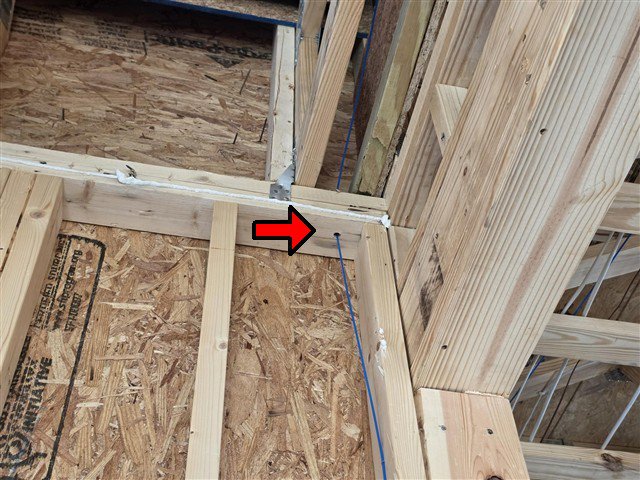
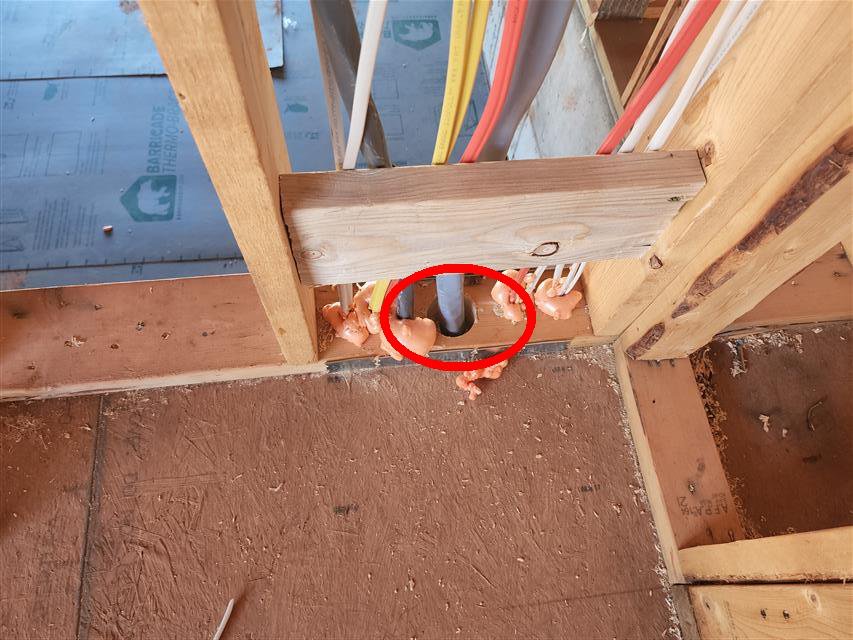
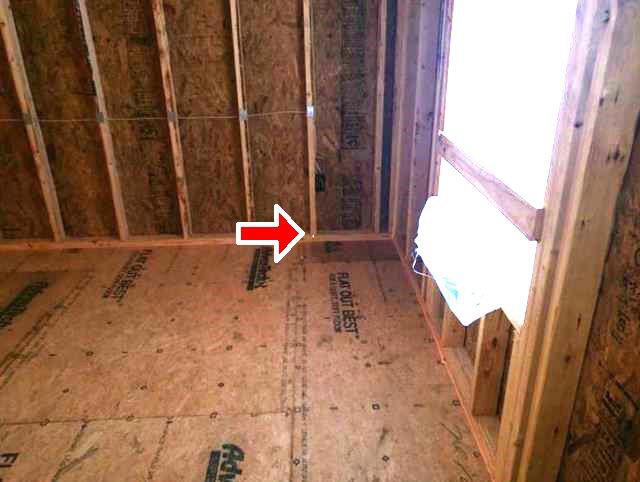
Homes B and E were missing fire caulking where wires and pipes pass between floors. That caulking slows fire and smoke from spreading through the walls. At Homes A and H, daylight was visible through gaps that should have been foam-sealed, which lets outside air in once the house is finished.
Microbial growth on framing (4 of 12 homes)
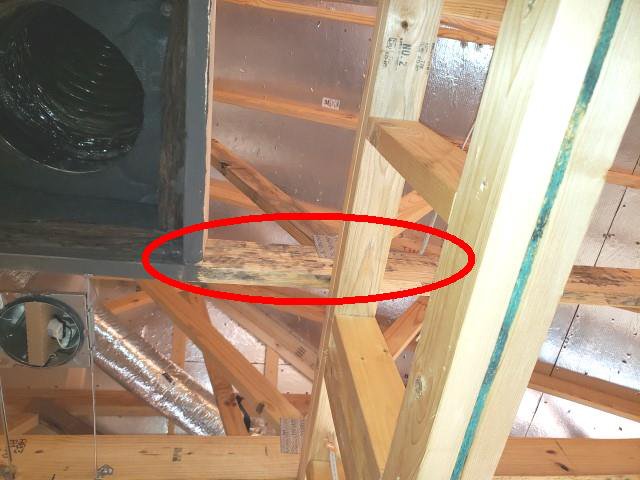
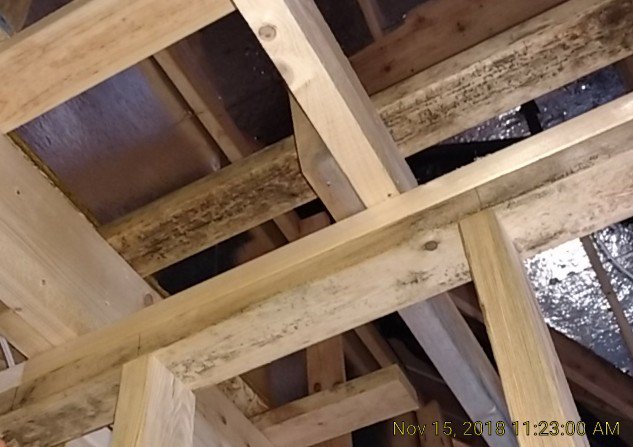
Homes F, I, K and L had discoloration and microbial growth on trusses or framing from lumber getting wet during construction. We recommend having it evaluated and cleaned before insulation and drywall seal it in.
Decks
At Home E, the deck ledger was only nailed to the house, the joist hangers were installed incorrectly, the posts were missing nails and there was no lateral bracing. At Home B, deck ledger bolts were missing their nuts and washers. A deck ledger that isn’t bolted can pull away from the house.
Grading and drainage
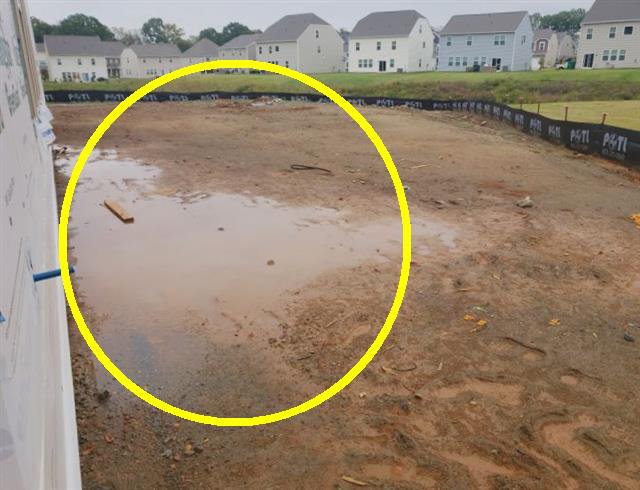
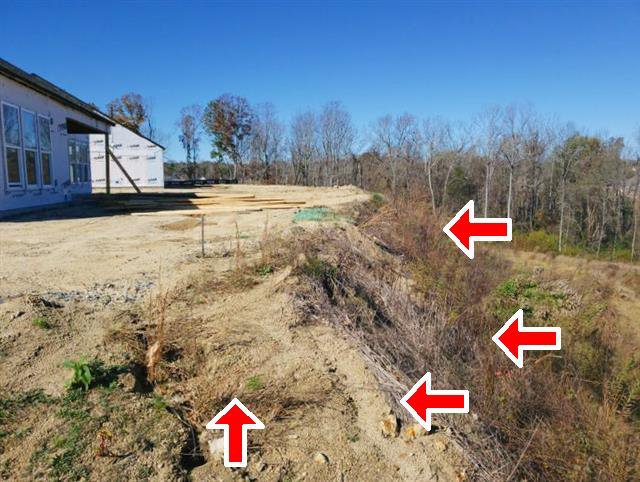
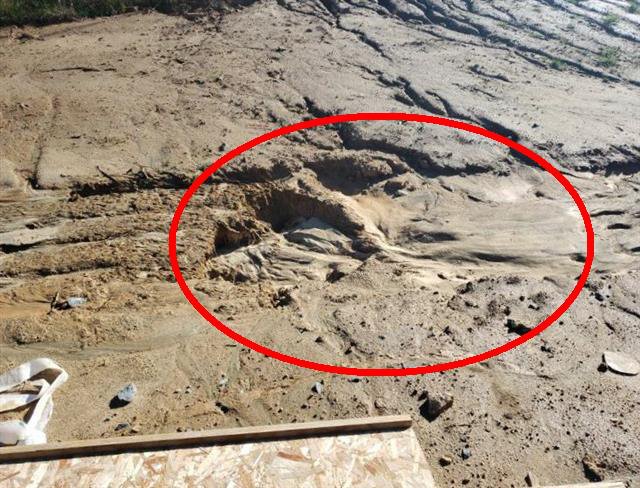
At Home J, the yard sloped toward the house and water was standing next to the foundation. Home I was built on fill soil, with an eroding bank about 18 feet from the rear corner. Home H had erosion around the house. Grading is often unfinished at this stage, but slopes like these need to be corrected before landscaping.
What the final inspections found
Four homes had a second inspection at the end of construction. Each one still turned up new problems, and three showed that items flagged at the pre-drywall visit hadn’t been fixed.
- Home E: at pre-drywall, the deck ledger was only nailed to the house. At the final, it was still missing its lag bolts, and some deck joist hangers were still missing fasteners. Sections of the roof covering were also still missing.
- Home F: wood debris flagged in the crawl space at pre-drywall was still there at the final. The final also found unsupported PEX supply lines and missing crawl space insulation.
- Home G: the final found a leaking cold-water supply line in a bathroom, second-floor ducts blowing heat when the first-floor thermostat was running, and missing ceiling insulation shown by thermal imaging.
- Home H: the damaged concrete driveway flagged at pre-drywall was still damaged at the final. The final also found a clogged waste line, a dishwasher that wouldn’t close, and thermal imaging showing poor insulation above the laundry room.
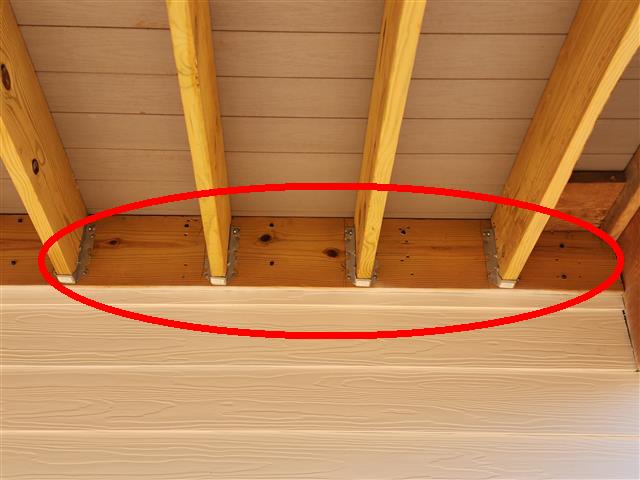
Home E at the final: the deck ledger, still not lag-bolted to the house.
A re-inspection is the only way to know a flagged item was actually corrected.
Timing matters
Three inspections show why the visit has to happen at the right moment. At Home A, insulation had already been installed in the exterior walls and parts of the ceiling, hiding framing we needed to see. At Home E, the windows and exterior doors weren’t in yet, which limited the inspection. At Home G, workers had cut the water supply line during the visit, so the plumbing couldn’t be tested under pressure. The best time is after the rough-ins are done and before any insulation goes in.
What this means for buyers
The most important parts of a new home are visible for only a short window during construction. Every home in this study had structural or framing defects at the pre-drywall stage, and each buyer got a photo-documented report to hand the builder while the fixes were still easy.
- Ask your builder when insulation is scheduled. Book the pre-drywall inspection after the rough-ins are done and before insulation goes in.
- Get it in writing. For truss damage, missing anchor bolts or hanger problems, ask for the manufacturer’s repair method or an engineer’s letter.
- Inspect again before closing. A final inspection confirms the earlier items were corrected and catches the finish-out problems that come later.
- Come back at month 11. A 1-year builder warranty inspection catches what shows up after the first few seasons, while it’s still covered.
Building a new home?
Book your pre-drywall inspection before the insulation goes in. Schedule
Or call 866-356-2363